
When it comes to pulling that perfect shot of espresso, there are a multitude of factors that come into play to make sure everything happens just right. With so many factors at work, taking control of your shots is a lot easier when you have the right tools on hand. And what's even more important than having the tools, is knowing how to use them. There’s more than one way to elevate your espresso game, so grab your portafilter and let’s dive in.
Dosing Funnel
Yes, you could load coffee grounds directly from the grinder into your portafilter, but if you could reduce overflow and make your shots more consistent, wouldn’t you? Overflow from the grinder is wasteful, messy, and can throw off your measurements -- which ultimately leads to inconsistent shot results. Using a dedicated dosing funnel ensures that all your coffee grounds are delivered straight into the portafilter, not all over your countertop.
How it works
-
Place the dosing funnel onto your portafilter. Hold your portafilter under your grinder and load the filter with fresh grounds.
-
Move your portafilter in a circular motion while filling so that you don’t end up with a mound of grounds in the middle.
-
With the funnel still in place, distribute your grounds using a WDT tool and/or a tamper/distributor combo.
-
Once you're finished, tap the portafilter on your tamping mat to settle the grounds, then remove the funnel.
Dosing Cup
It may not look like much, but a dosing cup can be a game changer. This deceptively simple tool lets you measure beans, load the hopper, activate the grinder, collect grounds, and even fluff up your grounds to break up clumps. This multi-purpose master gives you more precise measurements, more evenly distributed grounds, and a simplified routine.
How it works
-
Use the dosing cup to weigh and measure your beans on your scale, then drop them into your grinder's hopper.
-
If using a built-in grinder on a Breville machine, use the patented grinder activating tab to start the grinder. The lip on the cup even allows the cup to sit hands free in the grinder holder.
-
Once your grind process is complete, set the portafilter on the top of the dosing cup and flip everything over. Hold everything together and give it a good shake to break up and fluff up the grounds. Before removing the cup, tap the portafilter on your tamping mat in a circular motion to help settle the grounds evenly.
WDT Tool
WDT stands for Weiss distribution technique, which is essentially a espresso prep method that distributes the grounds in your filter basket as much as possible. This small tool has thin wires that rake through the grounds to break up clumps, close gaps, and prepare your coffee for tamping. This is especially useful if you’re having trouble with channeling and spurting or have a grinder that can’t be trusted to provide fluffy, even grounds.
How it works
-
Holding the WDT tool like a pencil, use a circular motion to stir through the grounds. Start at the bottom and lift the tool higher as you go. If you're using dosing funnel, make sure to leave the funnel attached, which will help stop grounds from jumping ship!
-
Gently distribute the grounds all the way up to the top layer.
-
Give the portafilter a tap to help settle everything into place, then tamp as usual.
Tamper/Distributor Tool
It’s no secret that the trick to making good espresso is properly packing the grounds into a neat, uniform puck. A well-tamped puck helps water flow more evenly, providing a balanced, fully extracted shot of espresso. You can use a dedicated tamper for this, but a tamper/distributor combo tool helps streamline your process. Aside from having the bonus of two-in-one, this style of tool also cuts out the guesswork by allowing you to set the exact depth of the tool on each side. This means you'll have consistent and level tamping pressure every time.
How it works
-
First, load your portafilter with fresh coffee grounds.
-
Set the distributor to the shallowest depth and place the blades into the coffee.
-
Gently twist the tool clockwise until the grounds are level. If they aren’t level after the first try, extend the distributor side slightly and try again. Be careful to only apply light pressure during this step, as pressure should only be applied during tamping.
-
Next, flip your tool to the tamper (flat side). Apply downward pressure from the top of the tamper into the grounds to compress the loose coffee into a puck. The depth of the tamper can then be set to match your desired tamping pressure such that when you're fully tamped, the side walls (rings) of the tamper make contact with the filter basket.
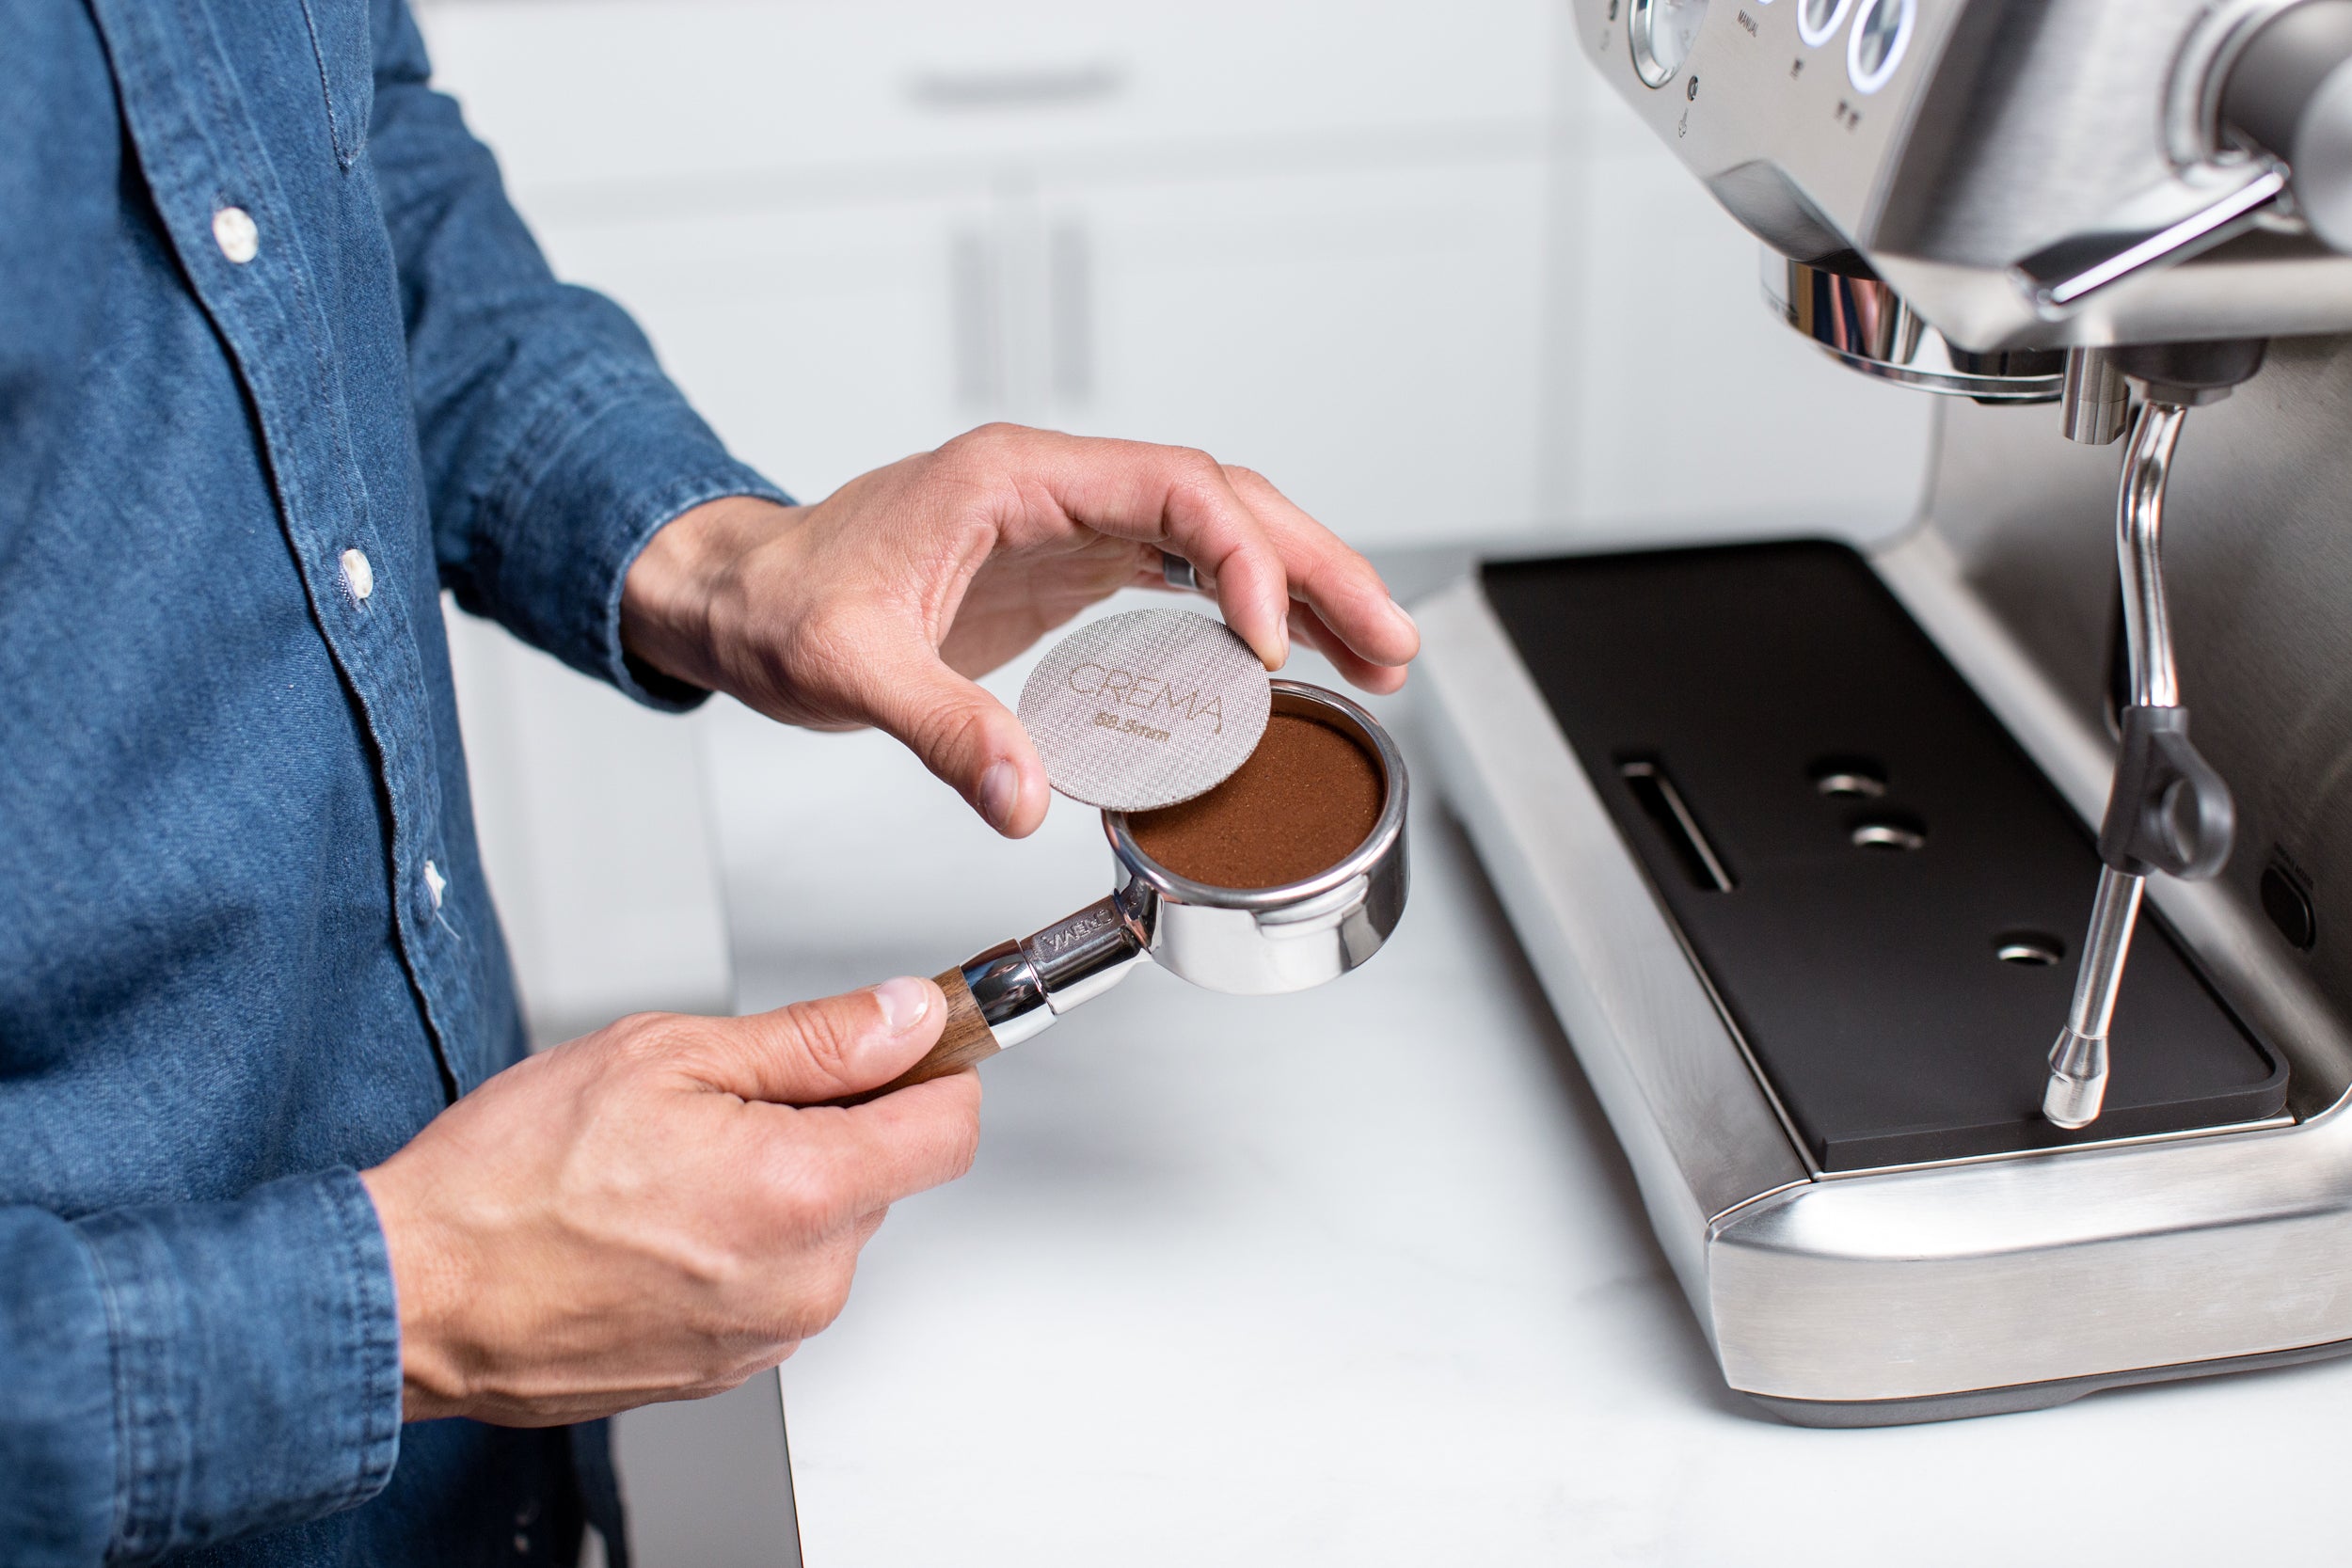
Puck Screen
So you’ve measured your coffee, loaded the portafilter, distributed the grounds, and tamped them down to perfection – now what? You could go ahead and start brewing now, but adding a puck screen may be the difference between a good cup and a great one. If your espresso machine is a bit too enthusiastic, the high-flow of water from the group head might be a bit too much for your puck to handle, causing water flow through your coffee unevenly. A puck screen will interrupt the flow of water and help to distribute it more evenly. Think of it as comparing the "jet" setting on your garden hose to the "shower" setting.
How it works
-
Using the puck screen is about as easy as it gets. After loading, distributing, and tamping using your methods of choice, simply drop the puck screen on top of the grounds and let 'er rip.
-
It's important to note that while most puck screens are quite thin, they do still add a bit of height to the overall height of the puck. If you're working on the higher end of the scale with your dosing, you may need to cut back slightly to accommodate.
Pulling perfect espresso shots is a lot smoother (pun intended) with the right tools. We carry a wide range of products and accessories for you to mix and match with your preferred workflow, so if you're new to espresso, or just hunting for something to up your game, feel free to reach out -- we'd love to help! Here are Crema, it's our mission for you to #LoveEveryShot.
